Egg Crusted Baked Rice with Vegetables

From Albert Bevia: This baked rice with vegetables, known as arroz con costra de verduras, is one of Spain’s best-kept rice recipes. To make this recipe, I used Spanish round rice, which is similar to Arborio rice. Of course, you can use any type of rice you like. Just make sure to check the rice package instructions. That way you get your liquid-to-rice ratios right on the money.  For the liquid I used homemade vegetable broth. But you can also use chicken broth, beef broth, or even water if you prefer. Just make sure to season accordingly if you’re using water.

TIPS & TRICKS to make this Recipe: I used an oven-proof paella pan. If you don’t have one, you can use any type of oven-proof pan, or even add everything into a casserole dish and use that to bake your rice.

Egg Crusted Baked Rice with Vegetables

Watch Albert preparing this recipe: https://www.youtube.com/watch?v=8P7n0SYCYvk

Ingredients

  • 2 1/2 cups vegetable broth 600 ml
  • 1/4 tsp saffron threads 0.17 grams
  • 1/4 cup extra virgin olive oil 60 ml
  • 1 medium onion (finely chopped)
  • 4 cloves garlic (roughly chopped)
  • 1 red bell pepper (finely chopped)
  • 1 green bell pepper (finely chopped)
  • 2 tomatoes (finely grated)
  • 1 cup short grain rice 190 grams
  • 1 cup cooked chickpeas (canned or jarred) 170 grams
  • 4 eggs
  • 1 tbsp chopped parsley 4 grams
  • sea salt & black pepper

Instructions

  1. Add the broth into a saucepan, pinch in the saffron, and heat with a medium heat
  2. At the same time, heat a 12-inch (30 cm) ovenproof pan with a medium heat and add in the olive oil
  3. After a couple of minutes, add in the chopped onion, garlic, and bell peppers, and mix continuously, after 4 minutes and the vegetables are lightly sautéed, add in the grated tomatoes, and season with salt & pepper, mix together and then simmer
  4. Once the grated tomatoes have slightly thickened, about 4 minutes, add in the rice and chickpeas, gently mix together until well mixed, then grab the simmering broth and gently pour into the pan, give it one final mix so everything is evenly distributed, and simmer
  5. In the meantime, crack the eggs into a bowl, add in the parsley, and season with salt & pepper, whisk together
  6. After simmering the rice for 8 to 10 minutes and you can see a lot of the broth has been absorbed but there is still some broth left, turn off the heat, and pour the whisked eggs over the rice, making sure to coat the entire surface
  7. Add the pan into a preheated oven at 200°C / 400°F for 8 to 10 minutes or until the eggs are just cooked through and create a crust on top, then remove from the oven and cover with a cloth
  8. After a couple of minutes, uncover the pan and serve the rice, enjoy!

Spicy Mediterranean Chickpea Soup

From Albert Bevia:
This spicy Mediterranean chickpea soup is what honest home cooking is all about. It’s filled with flavors, made with basic pantry staples, and done in just 40 minutes. Serve it next to a baguette that’s been sliced up and drizzled with olive oil and a bottle of Spanish wine for a fabulous meal.

TIPS & TRICKS to make this Recipe: What flavors this soup are the spices. Dried cilantro, ground cumin, Spanish paprika, crushed red pepper, and saffron. I used 1/2 tsp (1.30 grams) of crushed red pepper, which is what gives this soup that spicy kick. You can add in less or more depending on your taste.

Spicy Mediterranean Chickpea Soup

Watch Albert preparing this recipe: https://www.youtube.com/watch?v=t48K5sA3_ak

Ingredients

  • 3 tbsp extra virgin olive oil 45 ml
  • 1 medium onion (roughly chopped)
  • 6 cloves garlic (roughly chopped)
  • 2 carrots (thinly sliced)
  • 1 tsp ground cilantro 1 gram
  • 3/4 tsp ground cumin 2 grams
  • 1/2 tsp sweet smoked Spanish paprika 1.25 grams
  • 1/2 tsp crushed red pepper 1.30 grams
  • 1/4 tsp saffron threads .17 grams
  • 2 tomatoes (finely grated)
  • 2 cans chickpeas (garbanzo beans) 15.5 oz / 440 grams each
  • 3 cups vegetable broth 720 ml
  • 1 bay leaf
  • 3 oz fresh bagged spinach (roughly chopped) 100 grams
  • 1 tbsp lemon juice 15 ml
  • sea salt & black pepper
  • chopped cilantro for garnish

Instructions

  1. Heat a stockpot with a medium heat and add in the olive oil
  2. After a couple of minutes, add in the chopped onion, garlic, and carrots, mix together
  3. Once the vegetables are lightly sautéed, about 5 minutes, add in the dried cilantro, ground cumin, paprika, crushed red pepper, and saffron, mix together, then add in the grated tomatoes and season with salt & pepper, mix together and then simmer
  4. After about 4 minutes and the grated tomatoes have slightly thickened, add in the canned chickpeas (drained and rinsed), vegetable broth, and bay leaf, raise it to a high heat, and mix together
  5. Once it comes to a boil, place a lid on the pan and lower to a low heat, simmer for 15 minutes, then remove the lid and the bay leaf, add in the chopped spinach, and mix together until lightly wilted, then turn off the heat, add in the lemon juice, and mix together
  6. Transfer into shallow bowls and sprinkle with chopped cilantro, enjoy!

Simple Suggestions on the Mediterranean Diet

The Mediterranean diet is less a rigid eating plan and more a flexible, enjoyable lifestyle centered on fresh, seasonal foods and healthy habits. Its foundation includes vegetables, fruits, legumes, nuts, seeds, whole grains, and moderate dairy, with extra virgin olive oil serving as the primary fat source. Red meat is limited, while fish and poultry are favored, and processed foods and sweets are kept to a minimum. Beyond food, the diet emphasizes daily physical activity, rest, and the social sharing of meals.

For beginners, experts recommend stocking a “Mediterranean basket” of staples like olive oil, beans, nuts, fresh produce, herbs, and spices, and starting with simple recipes such as steamed greens drizzled with olive oil, garlic, and lemon. The approach is meant to be flexible and joyful, encouraging gradual adoption rather than strict rules, making it sustainable as both a diet and a lifestyle.

Mediterranean Pasta & Bean Salad

Recipe Corner

From Albert Bevia:
To make this recipe, I used fusilli pasta. But you can use whatever pasta you like. I just prefer fusilli, as it clings better to the dressing. Either way, make sure to check the pasta package instructions. That way you perfectly cook your pasta al dente.

TIPS & TRICKS to make this Recipe: What really flavors this pasta salad is the homemade dressing. Made with just olive oil, lemon juice, garlic, oregano, and crushed red pepper. Make sure to use the good stuff here, as it makes all the difference in the flavor.

Mediterranean Pasta & Bean Salad

Watch Albert preparing this recipe: https://www.youtube.com/watch?v=nefhT7xuCZw

Ingredients

  • 8 oz fusilli pasta 225 grams
  • 1 can white beans (drained & rinsed) 15.5 oz / 440 grams
  • 1/3 cup chopped red onion 50 grams
  • 1/2 cup chopped red bell pepper 75 grams
  • 1/3 cup sliced black olives 40 grams
  • 1 ball fresh mozzarella (cut into cubes) 4 oz / 125 grams
  • 1/2 cup chopped fresh basil 10 grams
  • sea salt & black pepper

FOR THE DRESSING

  • 3 tbsp extra virgin olive oil 45 ml
  • 1 tbsp lemon juice 15 ml
  • 2 cloves garlic (finely grated)
  • 1 tsp dried oregano 1 gram
  • 1/4 tsp crushed red pepper 0.65 grams
  • sea salt & black pepper

Instructions

  1. Fill a stockpot a little over halfway with water, season generously with salt, and heat with a high heat
  2. Once it comes to a boil, add in the fusilli pasta, cook until al dente (check pasta package instructions), then drain into a colander and rinse under cold water, shake off any excess water
  3. Transfer the pasta into a large bowl, along with the canned beans, chopped red onion, chopped red bell pepper, sliced black olives, cubed fresh mozzarella, and chopped basil, then season with salt & pepper, and mix together until well mixed
  4. To make the dressing, add the olive oil into a separate bowl, along with the lemon juice, grated garlic, dried oregano, and crushed red pepper, then season with a kiss of salt & pepper, and whisk together
  5. Pour the dressing over the pasta salad, and mix together until well mixed, serve at room temperature or even chilled, as it will hold for up to 3 to 4 days in the fridge, enjoy!

Spanish Cauliflower in Tomato Sauce | Coliflor en Salsa de Tomate

From Albert Bevia:
This Spanish cauliflower in tomato sauce, known as coliflor en salsa de tomate, is what simple and delicious food is all about.  To make this recipe, I used a head of fresh cauliflower. You can also use frozen cauliflower if you like. Just make sure to fully thaw it out beforehand. Either way, make sure all the florets are similar in size; that way, they all evenly cook.

TIPS & TRICKS to make this Recipe: You can serve this cauliflower warm, at room temperature, or even chilled. It will hold for up to 3 to 4 days in the fridge in an airtight container.

Spanish Cauliflower in Tomato Sauce | Coliflor en Salsa de Tomate

Watch Albert preparing this recipe: https://www.youtube.com/watch?v=RJz_WOoNBjU

Ingredients

  • 1 head fresh cauliflower 1.5 lbs / 675 grams
  • 3 tbsp extra virgin olive oil 45 ml
  • 1 small onion (finely chopped)
  • 4 cloves garlic (roughly chopped)
  • 1 tbsp sherry vinegar 15 ml
  • 1 tsp sweet smoked Spanish paprika 2.50 grams
  • 1/2 tsp dried thyme 0.50 grams
  • 1 can tomato sauce (passata) 15 oz / 425 grams
  • 1/4 cup vegetable broth 60 ml
  • 2 tbsp grated Manchego cheese 15 grams
  • sea salt & black pepper
  • chopped parsley for garnish

Instructions

  1. Fill a stock pot a little over half ways with water, season generously with salt, and heat with a high heat
  2. In the meantime, remove the outer leaves from the head of cauliflower, then cut the head into 4 evenly sized pieces (through the stem), remove the florets, making sure to cut the bigger ones into smaller ones that way they´re all similar in size, add the florets into a colander and rinse under water
  3. Once the water comes to a boil in the stock pot add in the florets of cauliflower, boil for 4 to 6 minutes or until they’re just tender, then drain into a colander
  4. Heat a large fry pan with a medium heat and add in the olive oil
  5. After a couple of minutes add in the chopped onion and garlic, mix continuously, after 3 to 4 minutes and the onion is translucent, add in the sherry vinegar, paprika, and thyme, quickly mix together, then add in the canned tomato sauce, vegetable broth, and season with salt & pepper, mix together, then lower to a low-medium heat and simmer
  6. After 5 to 10 minutes and the sauce has slightly thickened, add in the florets of cauliflower, mix together, simmer for 2 to 3 minutes, then remove from the heat
  7. Transfer into a serving dish, top off with the grated cheese, and chopped parsley, enjoy!

“Better than Chickpea Hummus” CREAMY Lentil Hummus

From Albert Bevia:
This creamy lentil hummus is possibly the best hummus I have ever tasted. We’re talking layer upon layer of so many great flavors, easy to make, and all done using humble everyday ingredients. Serve it as a tapas appetizer next to some pita bread and marinated olives for the best moment in your day.

TIPS & TRICKS to make this Recipe: What really flavors this hummus, besides the lentils, is the extra virgin olive oil and tahini paste. If you can’t find tahini paste in your area. You can substitute it for the same amount of creamy peanut butter.

“Better than Chickpea Hummus” CREAMY Lentil Hummus

Watch Albert preparing this recipe: https://www.youtube.com/watch?v=UPpCu0W0ypk

Ingredients

  • 1/2 cup dried green lentils 95 grams
  • 2 cups water 480 ml
  • 3 tbsp tahini paste 45 grams
  • 2 cloves garlic
  • 1/2 tsp ground cumin 1.50 grams
  • 1/4 tsp sweet smoked Spanish paprika .65 grams
  • 2 tbsp extra virgin olive oil 30 ml
  • 1 tbsp lemon juice
  • 2 tbsp water 30 ml
  • sea salt & black pepper
  • chopped cilantro and olive oil for garnish

Instructions

  1. Add the dried lentils into a fine sieve and rinse under water, then add the lentils into a saucepan, along with 2 cups water (480 ml), and heat with a high heat, once it comes to a boil, place a lid on the saucepan and lower to a low heat
  2. Once the lentils are just cooked through (check package instructions on the lentils you are using, my took about 15 to 20 minutes), remove the pan from the heat, drain the lentils in a colander and rinse under cold water, then shake off any excess water, reserve a spoonful of the lentils for garnish
  3. Transfer the lentils into a food processor, run the food processor for about 1 minute or until the lentils are well blended, making sure to scrape down on the sides at the half way point, then add in the tahini paste, garlic, cumin, paprika, olive oil, lemon juice, and season with salt & pepper, run the food procesoor for another 1 to 2 minutes or until all the ingredients are well blended
  4. Once the ingredients are well blended, with the motor still running, add in between 1 to 2 tbsp of water (15 to 30 ml) or until you get the desired creamy texture
  5. Transfer the hummus into a shallow bowl, using the back of a spoon create curves on the hummus, then garnish with the reserved lentils, a drizzle of olive oil, and some chopped cilantro, serve at room temperature or chilled, enjoy!

CREAMY Chickpea Cucumber Sandwich

From Albert Bevia:
What gives this sandwich that creamy goodness is Greek yogurt. I used low fat, but you can also use full fat, nonfat, or even a plant-based one to easily veganize this sandwich. Either way, when you’re mixing the chickpea mixture, if you see it’s too dry, just add in some more yogurt.

TIPS & TRICKS to make this Recipe: It’s important to lightly toast your sandwich bread. Otherwise, it will get mushy and break apart. You can make the creamy chickpea cucumber mixture ahead of time. It will hold for up to 3 to 4 days in the fridge in an airtight container.

CREAMY Chickpea Cucumber Sandwich

Watch Albert preparing this recipe: https://www.youtube.com/watch?v=i6kiHurcmh4

Ingredients

  • 1 jar cooked chickpeas (same as canned) 25 oz / 700 grams
  • 1 container low fat plain greek yogurt 5.3 oz / 150 grams
  • 1 tbsp dijon mustard 15 grams
  • 1 cup chopped cucumber 140 grams
  • 1/3 cup chopped red onion 50 grams
  • 1/4 cup chopped dill pickels 35 grams
  • 2 cloves garlic (finely grated)
  • 2 tbsp chopped chives 6 grams
  • 1 tbsp lemon juice 15 ml
  • sea salt & black pepper
  • 8 slices whole wheat sandwich bread

Instructions

  1. Drain the chickpeas into a colander and rinse them under water, then shake off any excess water, transfer the chickpeas into a large bowl, and using a potato masher or large fork, mash down on the chickpeas until they are semi-mashed, meaning it’s ok if you have little chunks of chickpeas in there
  2. Add the greek yogurt over the mashed chickpeas, along with the dijon mustard, chopped cucumber, chopped red onion, chopped dill pickles, grated garlic, and chopped chives, then add in the lemon juice, and season with salt and a generous portion of black pepper, mix together until well mixed, add in more yogurt as needed
  3. Lightly toast the slices of sandwich bread
  4. Add the creamy chickpea mixture over the slices of toast and top off with another slice of toast, enjoy!

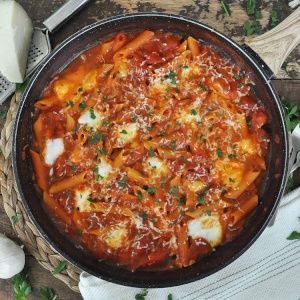
CHEESY Pasta with Tomato Paprika Sauce

From Albert Bevia:
To make this recipe, I used penne pasta. But you can use whatever type of thick-cut pasta you like. Such as rigatoni, macaroni, or even ziti. For the cheese, I used a combination of fresh mozzarella and grated Manchego cheese. You can use other types of cheese if you like or whatever you have on hand. But I tell you, the combination of these two cheeses gives an incredible pop of flavors to this pasta dish.

TIPS & TRICKS to make this Recipe: This cheesy pasta will hold for up to 3 days in the fridge and freeze for up to 3 months. When reheating, just add in some liquid if the mixture is too dry.

CHEESY Pasta with Tomato Paprika Sauce

Watch Albert preparing this recipe: https://www.youtube.com/watch?v=oAD8yy31UVk

Ingredients

  • 3 tbsp extra virgin olive oil 45 ml
  • 1 medium onion (finely chopped)
  • 5 cloves garlic (roughly chopped)
  • 1 tsp sweet smoked Spanish paprika 2.50 grams
  • 1 tsp dried oregano 1 gram
  • 1 can tomato sauce (passata) 15 oz / 425 grams
  • 1 can diced tomatoes 15 oz / 425 grams
  • 2 cups vegetable broth 480 ml
  • 8 oz penne pasta 225 grams
  • 1 ball fresh mozzarella (cut into small bite-sized pieces) 4 oz / 115 grams
  • 1/4 cup grated Manchego cheese 30 grams
  • sea salt & black pepper
  • chopped parsley for garnish

Instructions

  1. Heat a large fry pan with a medium heat and add in the olive oil
  2. After a couple of minutes, add the chopped onion and garlic into the hot fry pan, mix continuously, after 5 minutes and the onion is translucent, add in the paprika and oregano, quickly mix together, then add in the canned tomato sauce, canned diced tomatoes, and season with sea salt & black pepper, then turn it up to a high heat, give it a mix, and simmer
  3. After simmering the tomatoes for about 4 minutes and they’ve slightly thickened, add in the vegetable broth, give it a mix and bring to a boil, then add in the penne pasta, mix every 2 to 3 minutes, so the pasta doesn’t stick together and it all evenly cooks
  4. After cooking the pasta for 9 minutes *, which in my case was 3 minutes shy of the pasta being cooked al dente, add the chopped fresh mozzarella, making sure to evenly spread it around, then place a lid on the pan and lower to a low-medium heat, simmer for 3 to 4 minutes or until the pasta is cooked al dente, then turn off the heat and remove the lid*take this step when the pasta you are using is 3 minutes shy of being cooked al dente, make sure to check package instructions on the pasta you are using
  5. Top off the pasta with the grated Manchego cheese and some chopped parsley, serve at once, enjoy!

Moroccan Saffron Shrimp

Moroccan Saffron Shrimp

From Albert Bevia:

To make this recipe, I used raw Argentinian jumbo shrimp I bought frozen and thawed out and already peeled and deveined. However, you can use whatever type of shrimp you like. The most important thing is to make sure you pat them completely dry. This way they absorb all the flavors in the pan.

TIPS & TRICKS to Make this Recipe: It took me about 4 minutes to fully cook the shrimp. Of course, every pan and stovetop heats differently. Just keep an eye on the shrimp; that way you don’t overcook them. Which will give them a rubbery texture.

To see Albert making this recipe go to: https://www.youtube.com/watch?v=e4eGPTdQwtU

Ingredients

FOR THE RICE

  • 2 cups water 480 ml
  • 1 cup long grain rice 190 grams
  • sea salt

FOR THE SAFFRON SHRIMP

  • 3 tbsp extra virgin olive oil 45 ml
  • 2 onions (finely chopped)
  • 5 cloves garlic (roughly chopped)
  • 1/2 tsp sweet smoked Spanish paprika 1.25 grams
  • 1/2 tsp ground turmeric 1.50 grams
  • 1/2 tsp ground ginger 1 gram
  • 1/4 tsp ground cinnamon .65 grams
  • 1/4 tsp saffron threads .17 grams
  • 2 tbsp chopped cilantro 8 grams
  • 1/2 cup vegetable broth 120 ml
  • 1 lb raw shrimp (peeled & deveined) 450 grams
  • sea salt & black pepper
  • lemon juice
  • chopped cilantro for garnish

Instructions

  1. To make the rice, add the water into a saucepan, season generously with sea salt, and heat it with a high heat
  2. In the meantime, add the rice into a fine sieve and rinse under water until it starts running clear underneath, about 1 minute
  3. Once the water comes to a boil in the saucepan, add in the rice, give it a mix, then place a lid on the pan and lower to a low heat
  4. While the rice is cooking, make the saffron shrimp, heat a large fry pan with a medium heat and add in the olive oil
  5. After a couple of minutes add in the chopped onion and garlic, mix continuously, after 6 to 8 minutes and the onions are translucent, add in the paprika, ground turmeric, ground ginger, ground cinnamon, saffron, chopped cilantro, and season with sea salt & black pepper, mix together, then add in the broth and turn it up to a high heat, mix together and then simmer
  6. In the meantime, add the shrimp over some paper towles, all in a single layer, pat completely dry, then season with sea salt & black pepper just on one side
  7. After simmering the broth for 5 minutes, add the shrimp into the pan, mix together, then place the shrimp in a single layer, just as best as you can, then place a lid on the pan and lower to a low-medium heat
  8. While the shrimp are cooking move back to the rice, after 15 to 18 minutes and the water has been absorbed and the rice is cooked through (check package instructions on the rice you are using), remove the lid and the pan from the heat, using a fork, gently fluff the rice, then transfer into serving dishes
  9. After simmering the shrimp for 3 to 4 minutes and they’re just cooked through, remove the lid and the pan from the heat
  10. Add some of the shrimp mixture over the rice, squeeze some fresh lemon juice over the shrimp and sprinkle with chopped cilantro, enjoy!

Ultimate Tuna Burgers

To make this recipe, I used canned tuna in olive oil. You can also use canned tuna in water if you like. However, I did use the reserved olive oil from the tuna to fry the patties. I topped the burgers off with some sliced tomato, red onion, shredded lettuce, and a simple homemade tzatziki that truly elevates the tuna patties. To add some heat to this burger, just add a dash of chili powder or hot smoked paprika.

TIPS & TRICKS to Make this Recipe: Once you have the tuna mixture well mixed, make sure to push down on it until you get a paste-like texture. This is to ensure all the ingredients are well bound. That way, once you cook your patties, they hold their shape and won’t fall apart.

Watch Albert making this recipe: https://www.youtube.com/watch?v=QGAgy1KDSqA

Ultimate Tuna Burgers

Ingredients

FOR THE TUNA PATTIES

  • 2 cans tuna in olive oil 4 oz / 110 grams each
  • 1/4 cup plain breadcrumbs 35 grams
  • 2 cage-free organic eggs
  • 1 shallot (finely chopped)
  • 1 clove garlic (finely grated)
  • 2 tbsp chopped parsley 8 grams
  • sea salt & black pepper

FOR THE TZATZIKI SAUCE

  • 5 oz plain Greek yogurt 150 grams
  • 1/4 cup grated cucumber 35 grams
  • 1 clove garlic (finely grated)
  • 1/2 tsp dried dill 1 gram
  • 2 tsp lemon juice 10 ml
  • 1/2 tbsp extra virgin olive oil 8 ml
  • sea salt & black pepper

EXTRAS

  • 3 hamburger buns (lightly toasted)
  • 1 tomato (thinly sliced)
  • 1/2 red onion (thinly sliced)
  • handful shredded lettuce

Instructions

  1. Drain the cans of tuna into a fine sieve with a bowl underneath, gently flake the tuna to remove any excess oil, then transfer into a large bowl, along with the breadcrumbs, eggs, chopped shallot, grated garlic, chopped parsley, and season with sea salt & black pepper, mix together, then mash down on the mixture until you get a paste-like texture
  2. Transfer the mixture over a clean flat surface, cut into 3 evenly sized pieces, then shape each one into a ball, making sure to squeeze the mixture in your hand, this is to ensure everything is well bound, then gently mash down on each ball to shape the patties, about 1 1/2 cm (5/8 inch) thick
  3. Heat a large fry pan with a medium heat and add in the reserved olive oil from the canned tuna
  4. After a couple of minutes add in the tuna patties, fry for 5 minutes per side or until cooked through and golden fried
  5. In the meantime make the tzatziki, add the Greek yogurt into a bowl, then add the grated cucumber over some paper towels and squeeze the water out, transfer the cucumber into the bowl with yogurt, then add in the grated garlic, dried dill, lemon juice, and olive oil, then season with sea salt and a generous portion of black pepper, and whisk together until well mixed
  6. Once the tuna patties are cooked through and golden fried, about 5 minutes per side, remove from the pan
  7. To assemble the burgers, add some of the tzatziki over the bottom bun, then add one of the tuna patties, some sliced tomato, sliced red onion, and shredded lettuce, then add another dollop of the tzatziki over the top bun and place over the burger, enjoy!